

How To Make A Corner Stuffed Animal Zoo

Are stuffed animals taking over? This DIY stuffed animal zoo is the perfect solution for storing those hirsuite friends! Become the free plans and beginning building!
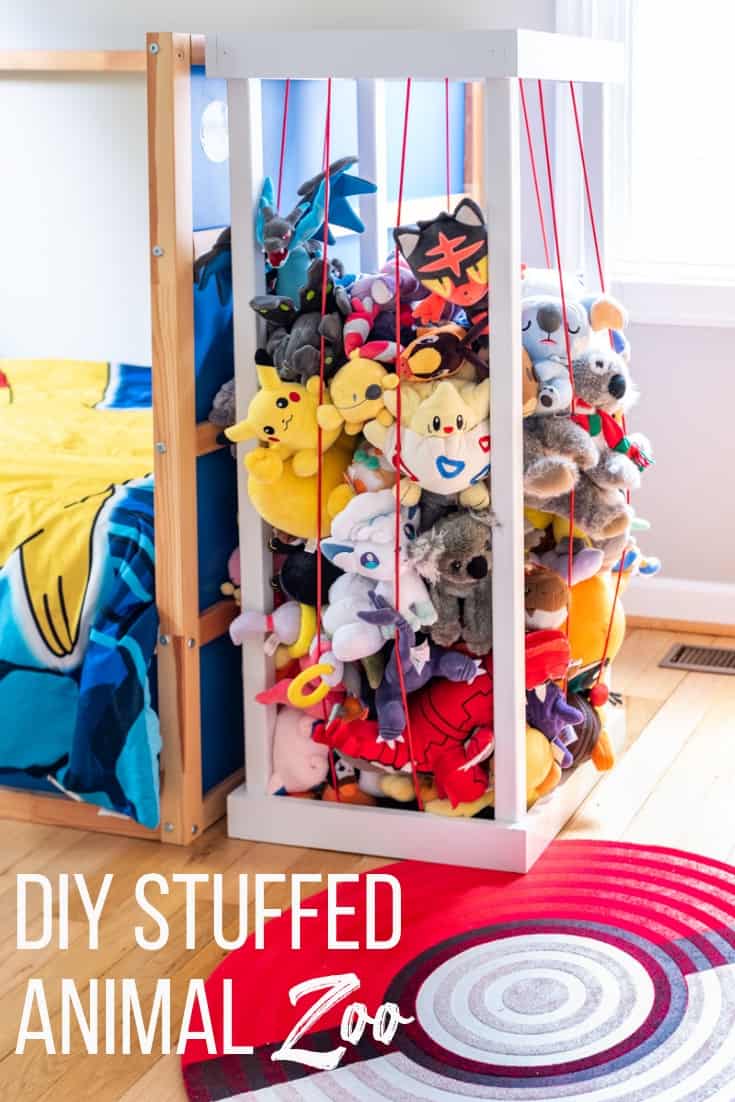
Our son is OBSESSED with Pokemon, and has amassed quite the drove of Pokemon stuffed animals. It's gotten out of control! This DIY stuffed brute zoo contains them all in i compact spot, and makes cleaning up fun! I've created free woodworking plans and so yous tin make your ain!
This postal service contains chapter links for your convenience. Purchases made through these links may earn me a pocket-sized commission at no additional price to you lot. Please visit my disclosures page for more than data.
There are lots of variations of the stuffed animal zoo all over the internet, because it's and then easy to customize to fit your infinite. Our son'due south room is tiny, so my version has a very pocket-size footprint that extends vertically upwards to the top of his IKEA Kura bed.
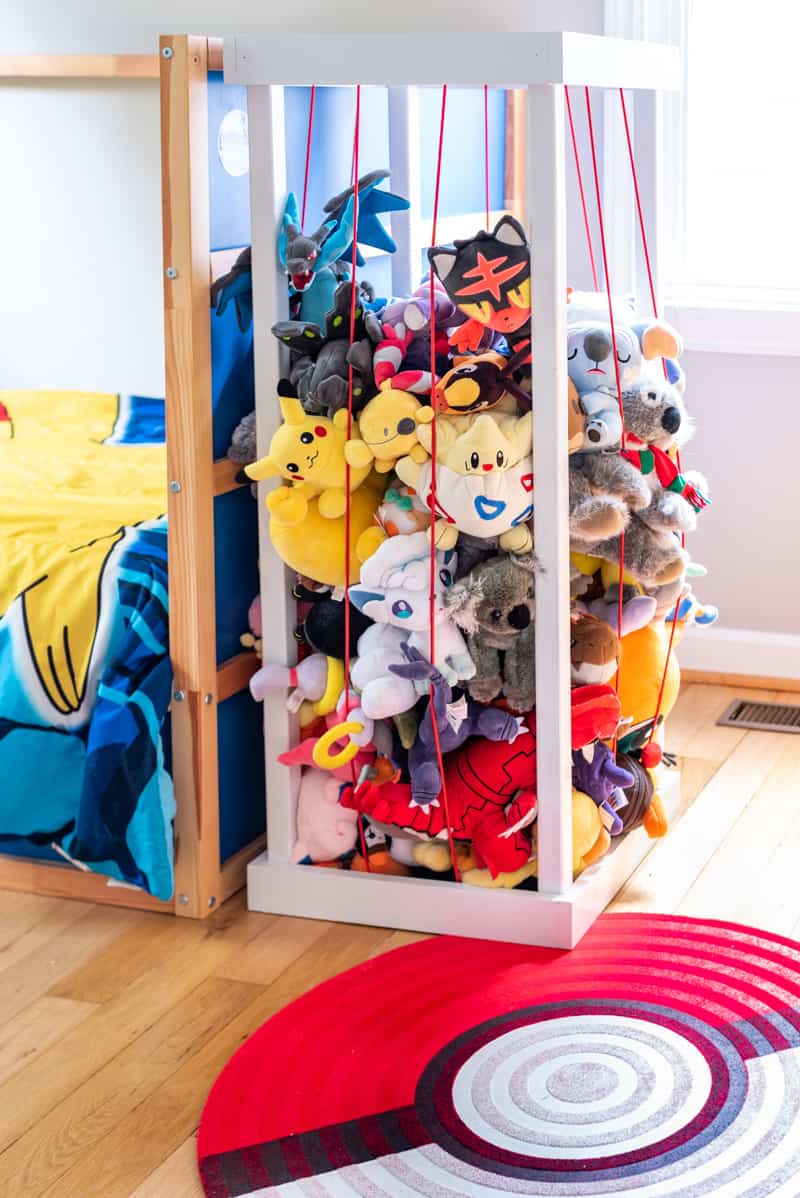
We call this stuffed animal zoo the "Pokemon Center" since it houses his vast collection of Pokemon plushes. He may exist a piffling spoiled. 😉 The Pokemon theme continues with the DIY Pokeball rug and framed posters I made as well!
How to Build a Stuffed Animal Zoo
Cutting the Pieces
You want to offset with the straightest 2 x 2 boards you tin find. I went through the entire pile at Dwelling Depot searching for ones that weren't warped, twisted or had lots of knots. For the 1 x iii's, I used pre-primed boards, because they tend to be straighter and saves me a step!
The blimp animal zoo dimensions are 18" square and 45 ½" tall. You tin alter these measurements to fit your space!
- two ten ii boards cut to 45 ½" - cutting 4
- one x iii boards cutting to 18" - cut 4
- ane x 3 boards cut to 16 ½" - cut four
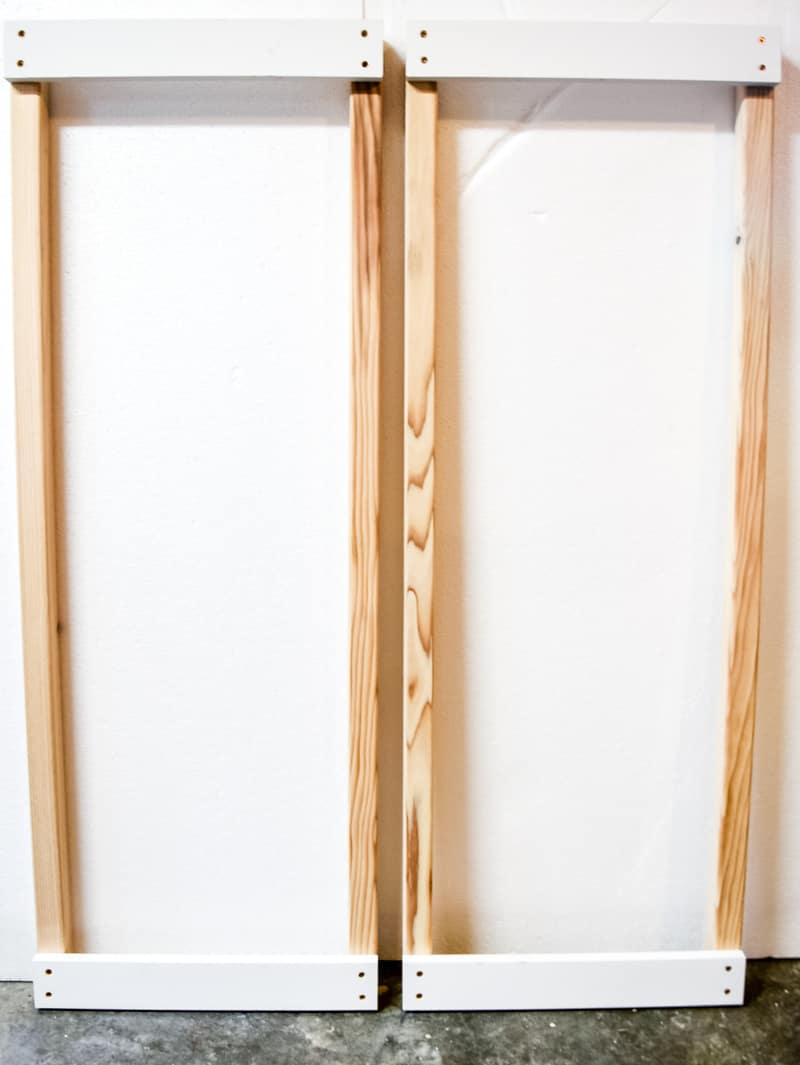
Get together The Two Sides
Predrill two countersink holes into the ends of the sixteen ½" long 1 ten 3 pieces and so that the screw heads will rest below the surface. You can acquire more about how to countersink screws hither. Then attach the 1 x iii pieces to the 2 10 2 boards with 1 ¾" long screws, making sure everything is square.
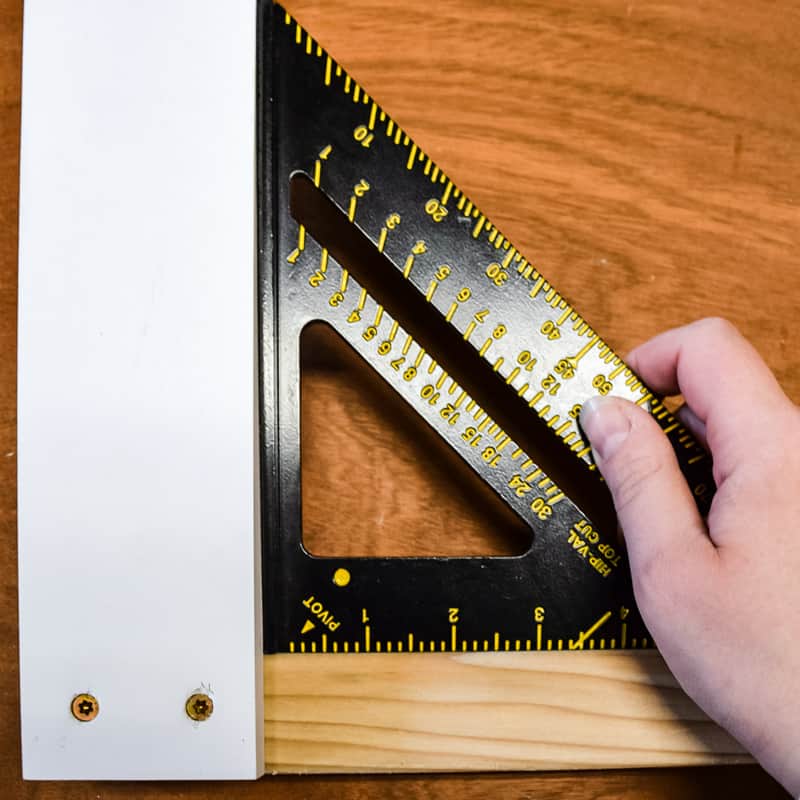
Repeat for the bottom. Be sure to measure the diagonal in both directions to check for square. If the two dimensions match, information technology'southward perfect!
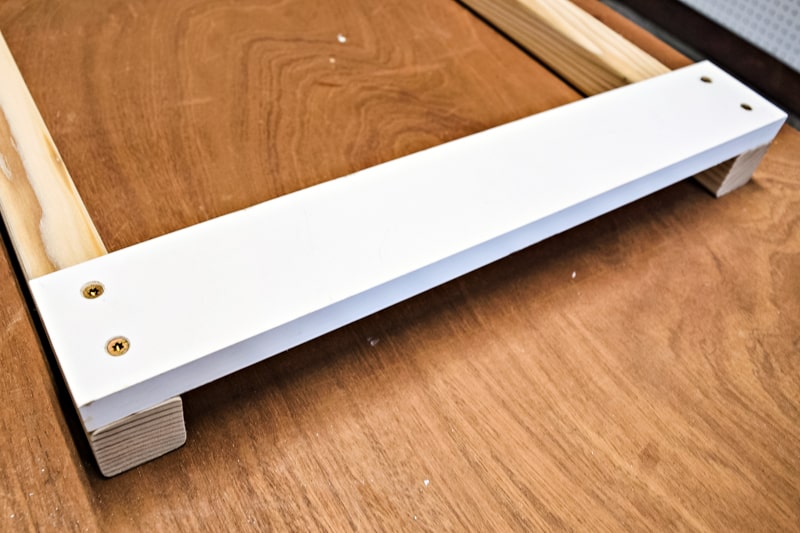
Your sides should look like this when consummate.
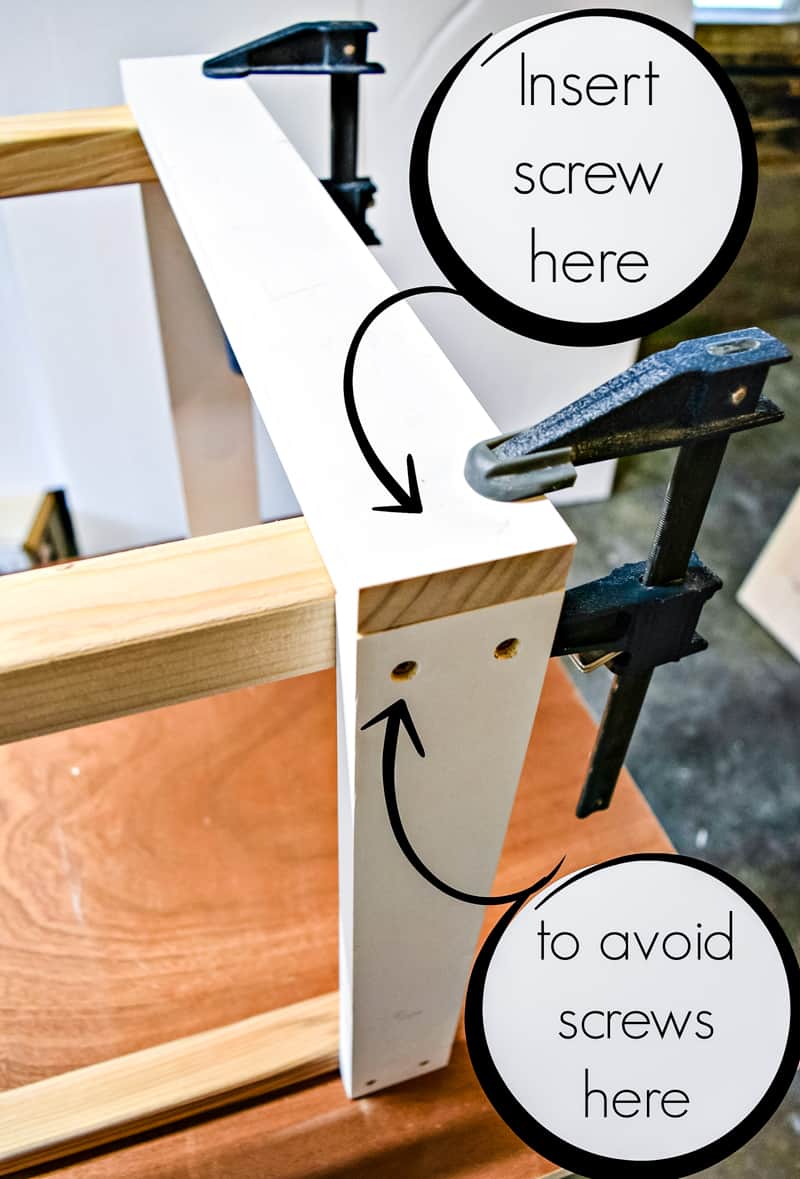
Attach Connecting Pieces
Set each side on its edge with the i x three boards facing outward. Clamp the 18" long i x 3s across the top and bottom to hold them in identify.
There'southward non a whole lot of room in a 2 ten 2 for all those screws, so strategic placement is important! In order to avert the screws already inside, I just used 1 screw in the centre as shown below.
Fill Holes and Paint
If you're going for a rustic feel, you tin go out the screws exposed and stain the entire piece (don't utilize pre-primed boards if you desire to stain information technology). I wanted a cleaner expect, then I filled the countersunk holes with wood filler, then sanded it polish when dry. I primed the 2 x ii's, so painted the DIY stuffed animal zoo with two coats of semi-gloss white paint.
Attach Screw Optics
These spiral optics keep the "bars" of the stuffed animal zoo evenly spaced, while also allowing the bungee cord to stretch and retract. Mark the placement on the within of the 1 x 3 boards 4 ½" in from each side, and 1 ¼" down from the elevation.
Drill a small airplane pilot hole at each of these spots, but don't become likewise far into the wood or you'll popular out the other side! I screwed the optics in past hand, positioning the bottom ones horizontally and the acme ones vertically.
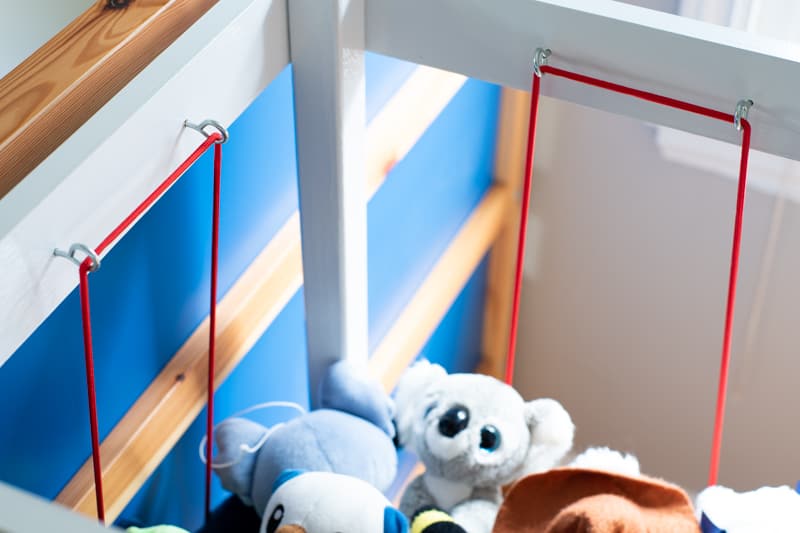
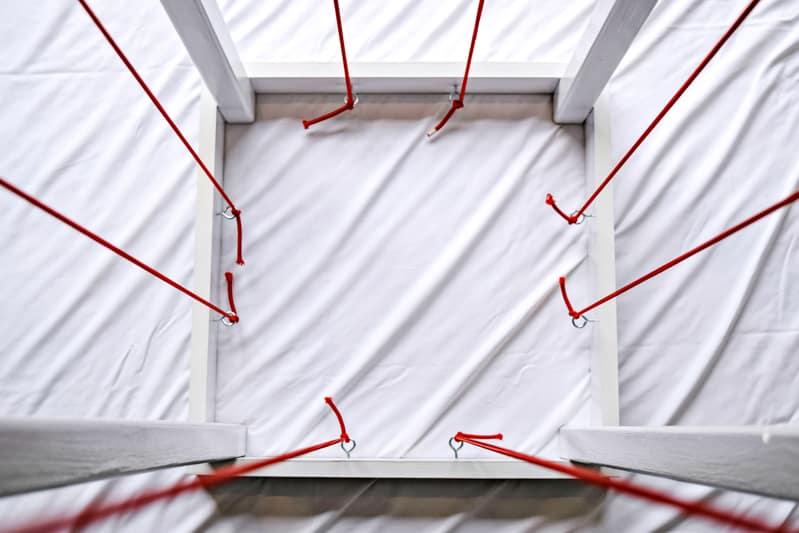
Tie the stupor cord to one of the lesser eyes, then thread it through both of the top optics earlier bringing it dorsum downward on the other side. This allows for more give when pulling apart the bars and looks nicer from the peak.
Pull the stupor cord until it is taut plenty to concur the toys in identify before tying off the end. I cut the knots a footling long to make information technology easier to suit if the daze cords stretch out over time. The ends will be covered up by all the blimp animals anyway!
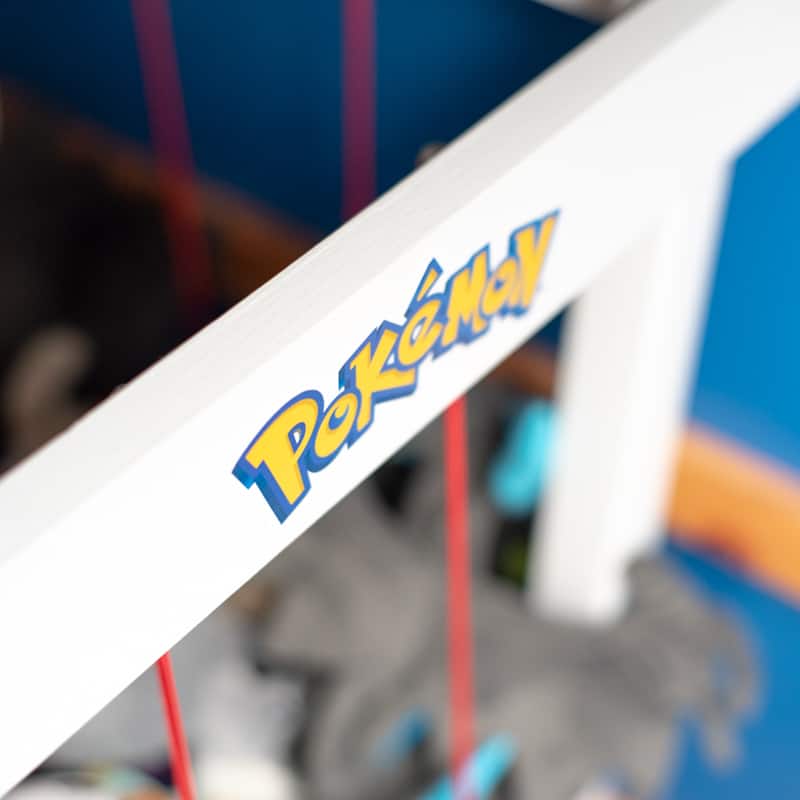
For the finishing touch, I applied the Pokemon logo to the top. Y'all tin personalize it with your child's name, or just stencil "Zoo" if you prefer.
Fill up it upwardly!
I enlisted the help of my son to round up all his Pokemon plush toys to make full his new stuffed animal storage zoo. I never realized quite how many he had until we put them all together like this! Estimate he really does need to catch them all!
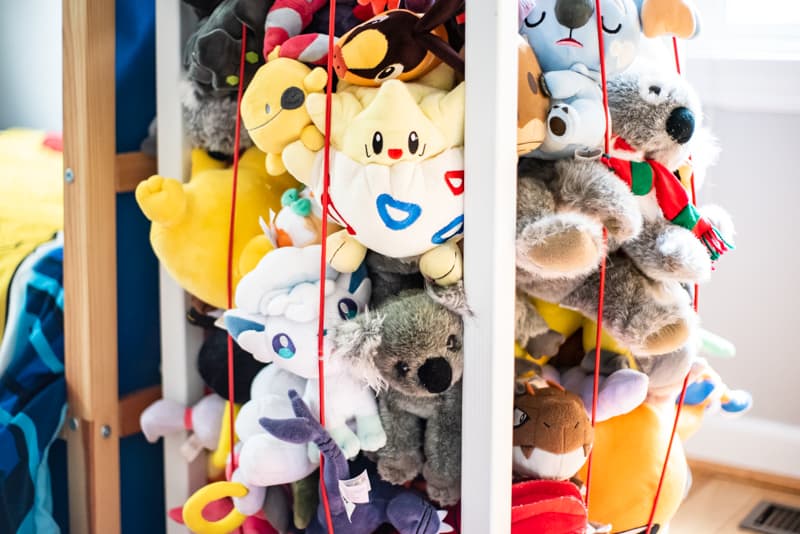
The "confined" of the stuffed fauna zoo keep them all from tumbling out. The stretchy bungee cords make it easy to separate the bars and catch the one you're looking for. The little guys like to escape, but we merely toss them back in until they find a condom spot!
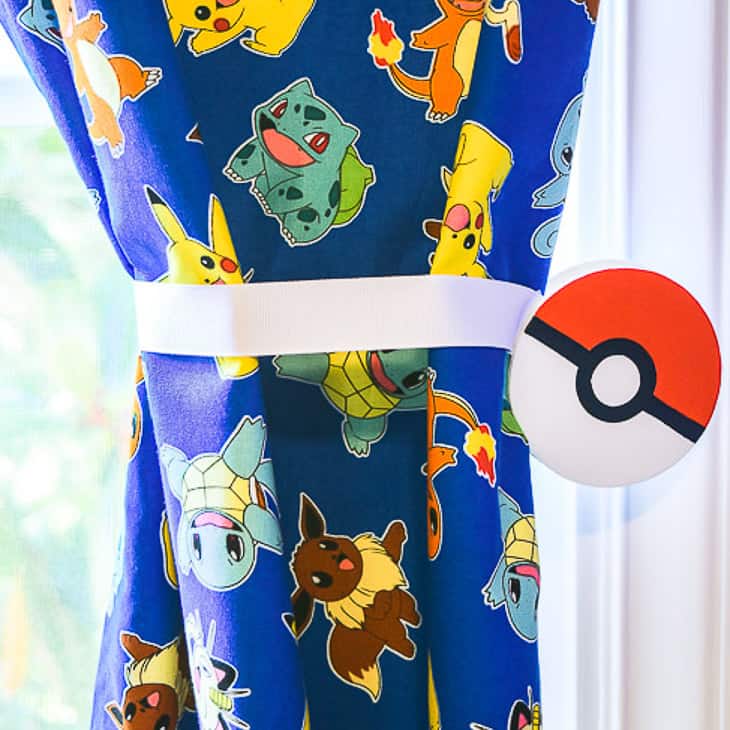
Want more Pokemon bedroom ideas? These Pokeball magnetic mantle tie backs would be perfect for whatever budding Pokemon trainer's bedroom!
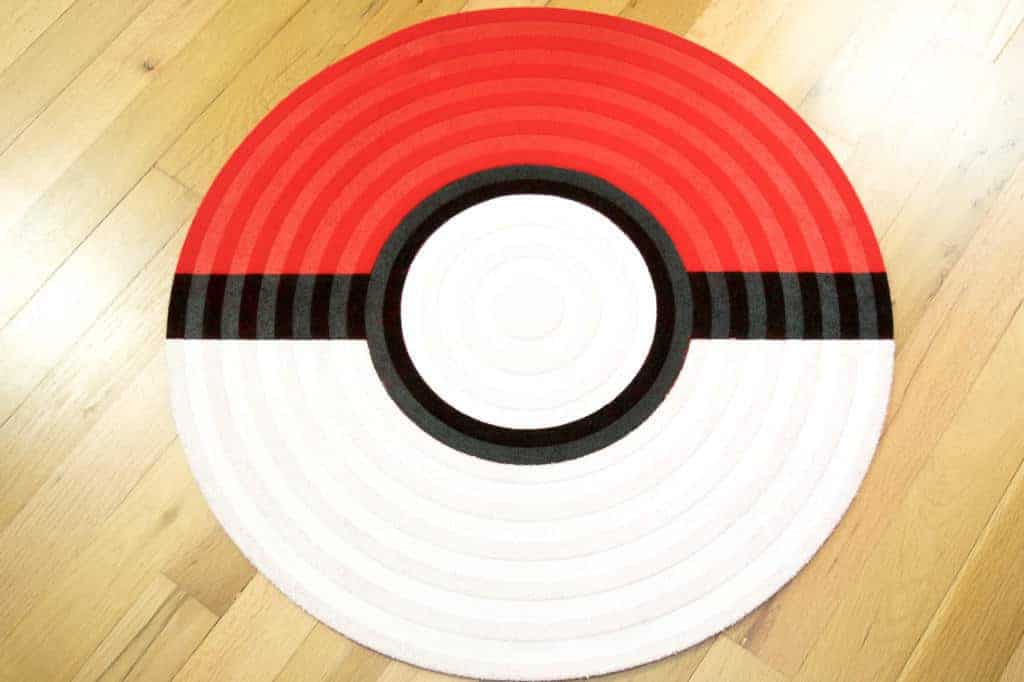
The Pokeball rug you see in front of the stuffed creature zoo cage is an IKEA throw rug that I painted!
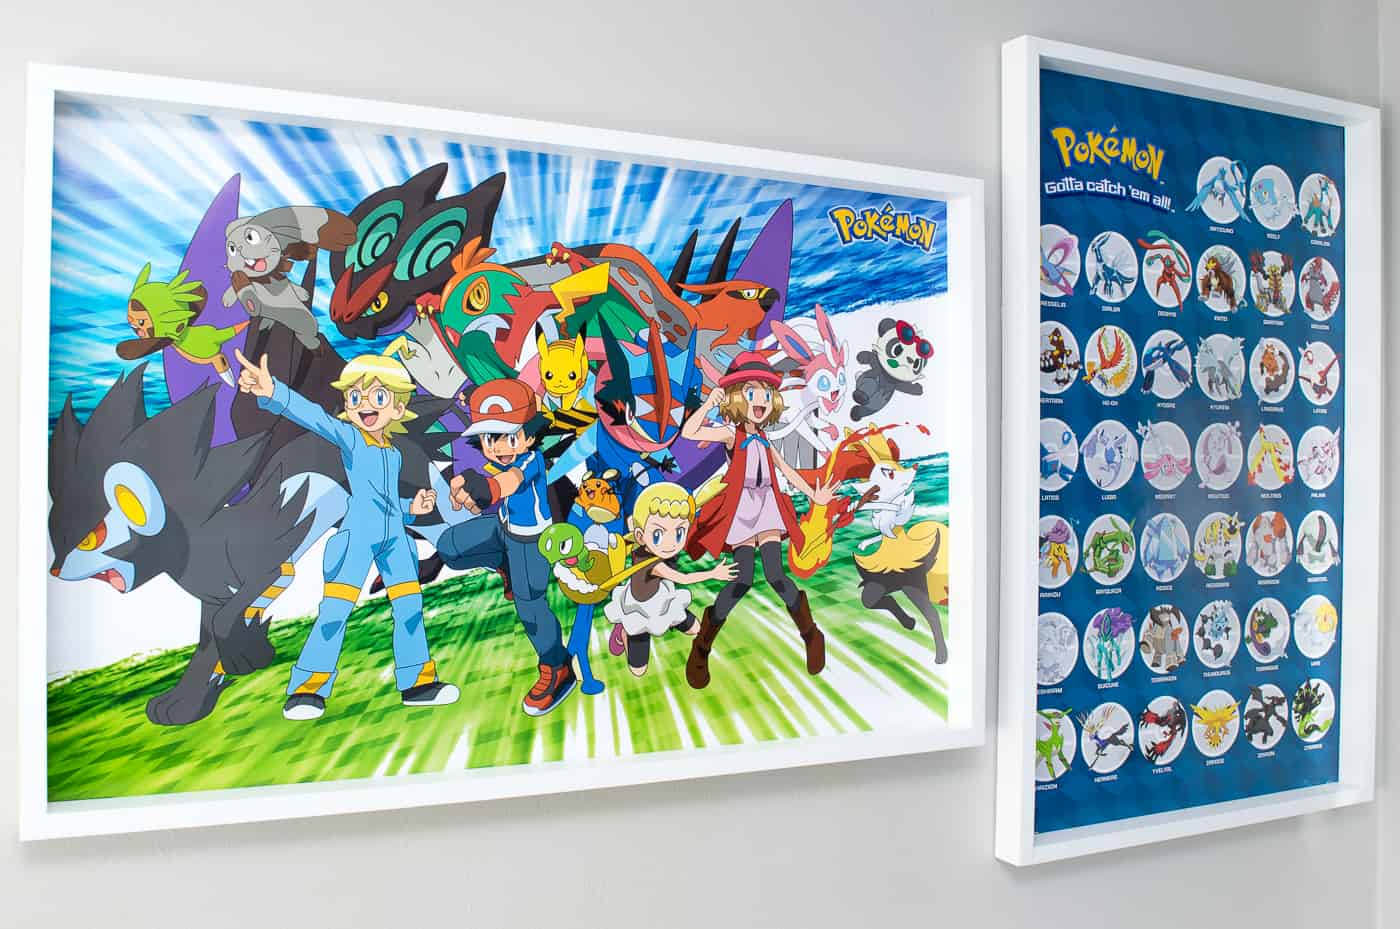
Fifty-fifty his wall posters are Pokemon themed! Bank check out how to frame a poster for less than $x!

Source: https://www.thehandymansdaughter.com/diy-pokemon-center-or-stuffed-animal-zoo/
Posted by: fergusonpainarompat1996.blogspot.com
0 Response to "How To Make A Corner Stuffed Animal Zoo"
Post a Comment